I don’t mean to get your hopes up. Sadly, the Aeropress doesn’t make true espresso. There’s just no way for the brewer, as capable and versatile as it is, to produce enough pressure to brew real deal espresso.
However, I’ve found a recipe that comes closer than any recipe I’ve ever seen before. If you’ve been looking for an Aeropress espresso recipe, you’ve found it. This one’s a little odd and may take some tinkering to get just right, but once you’ve figured it out, you’ll be glad you joined me on this journey.
With Aeropress espresso, there’s a whole new realm of drinks available to you. You can enjoy it as is or cut it with a variety of liquids to make creative beverages. Cut the shot with tonic water to make your own espresso tonic or steam some milk to make a cappuccino. Use the shot as a substitute in your favorite cold brew coffee cocktail.
There are many directions you can go with Aeropress espresso. But first, you need to know how to make it.
Credit Where Credit Is Due
I wish I could take credit for discovering this great recipe, but it’s not mine to take. This recipe for Aeropress espresso was first documented by Michael Mac Donald, a specialty coffee roaster in South Africa.
Donald is a man who knows his craft. He occasionally releases blogs concerning coffee brewing science and techniques, which is where I came across this recipe.
That being said, after making coffee this way a couple dozen times, I found my own little spin on the recipe to make it easier. I’ll let you know when my recipe addition comes up.
How Pressure Affects Extraction In Espresso
The pressure you generate when you press down the Aeropress plunger or initiate an espresso shot doesn’t just push the coffee through the filter and into your mug. It actually affects your coffee’s extraction.
Pressure causes extra microscopic coffee particles to rush off and out of the coffee grounds. It also increases the rate of diffusion, meaning the yummy coffee acids, oils, and other things flow into the water more quickly. The more pressure you apply, the quicker you extract stuff from the coffee grounds.
This is why espresso machines work: fine grounds, paired with a short brew time and intense pressure, produce a rich and balanced form of concentrated coffee.
Read: The Ultimate Guide To Espresso
Normal coffee brewers like french presses and pour over brewers could never dream of making coffee that’s so concentrated and balanced at the same time. Without the element of pressure, they’re limited to the golden brewing ratios, which brew great coffee, but not great concentrated coffee.
The Aeropress, however, has the power of pressure. It's not exactly a manual espresso maker, but you can get surprisingly close to that true espresso concentration with it.
How Aeropress Espresso Differs From Real Espresso
The Aeropress is a marvelous coffee brewer. It brews great coffee, can be used literally anywhere and is quite forgiving. One of its few downfalls is that it isn't exactly what it's advertised as: a manual espresso maker.
Espresso makers generate anywhere between 8 and 10 bars of pressure when they’re pulling shots. In normal person language, that’s about 640 pounds of pressure.
Read: The Ultimate Guide To Aeropress Coffee
For most people in the history of the human race, achieve that kind of pressure with has been impossible. It doesn’t matter how often you workout, your body simply isn’t made to apply that much pressure to anything.
According to the Aeropress website, their brewer is only capable of producing 0.35 to 0.75 bars of pressure (25-50 pounds) before reaching its apex. As it turns out, not only are you incapable of achieving 640 pounds, the device itself isn’t designed to generate that much pressure either. Only a machine - a few strategic levers at the very least - can do such a thing.
True espresso is rich, aromatic, very intense, bright, and has a heavy, syrupy body. A layer of fine crema tops the shot and lasts sometimes a minute before decaying back into the shot.
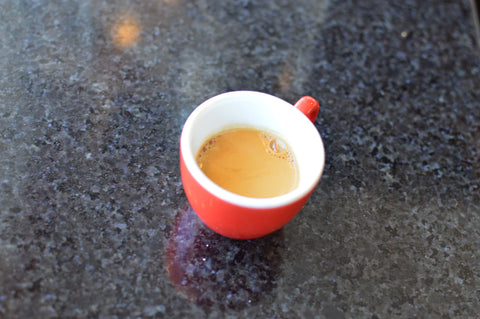
Aeropress espresso is rich, aromatic, somewhat intense, crisp, and has a slightly heavier than normal body. A thin layer of large bubbles tops the shot, but they quickly decay back into the liquid. It’s delicious, balanced, and concentrated - but not as concentrated or intense as true espresso.
Now that you’re well-versed in the ways of pressure brewing, let’s dig into the actual recipe.
Aeropress Espresso Recipe
Start by collecting your tools and ingredients.
- Aeropress + Filter
- Coffee Grinder
- Coffee Scale
- Water Kettle
- 17g of Coffee
- Mug
- Timer
- Rinse and place your Aeropress filter of choice in the filter cap and set it aside. Insert the plunger about halfway into the brewing chamber.
- Bring your clean, fresh water to 195 degrees Fahrenheit. While this is a lower temperature than I normally suggest, here it’s appropriate. Since you’re going to apply as much pressure as you can when the time is up, reducing your water temperature gives you a little wiggle room so you don’t accidentally over extract.
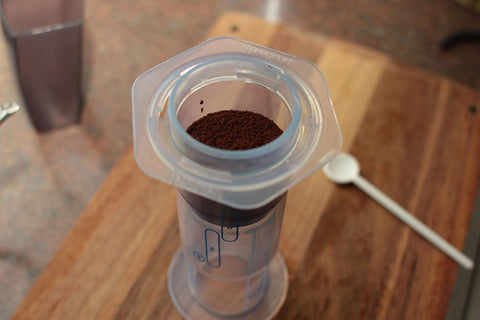
- Grind your coffee at a fine setting. Think castor sugar or finer. Pour the grounds into the Aeropress. Place the Aeropress onto your scale. Zero the scale and your timer. Get ready.
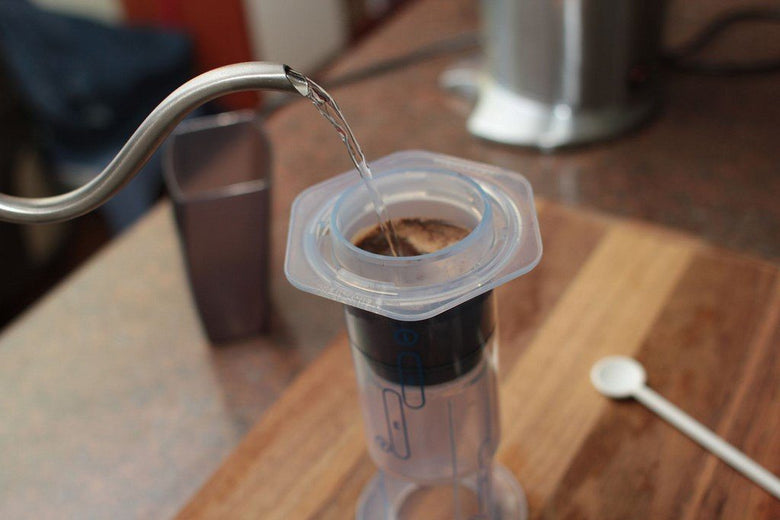
- Start your timer and begin pouring in 55g of water. Pour very slowly. It should take you 10 seconds to reach your target water weight.
- Grab the Aeropress and shake it in a circular motion for 15 seconds so that the brewing slurry spins around on the inside. This seems to be easier than stirring with the paddle like Donald originally suggests.
- At 0:25, attach the filter cap, flip the brewer onto a mug, and plunge like your life depends on it. You should have pushed out all the liquid coffee by 0:30.
Set the Aeropress aside and behold your Aeropress espresso. Smell it, taste it, savor it. You’ve earned it.
Read: A Recipe For Shaken Iced AeroPress Coffee
Your Aeropress Filter Matters
As Donald points out in his blog, the type of filter you use when you make Aeropress espresso can make a big difference in the flavor and body of your shot. Let’s look at the differences.
Paper Filters produce a clean cup and filter out all coffee particles. The absence of these microscopic coffee particles causes the acids of your coffee to taste more bright and pronounced. The natural coffee oils will largely be soaked up by the paper, reducing your shot’s body.
Metal Filters produce a heavier cup that’s more akin to true espresso. A small amount of micro-grounds pass through the fine mesh, along with the coffee’s natural oils, to produce a richly aromatic and silky shot with a lower perceived acidity.
Both filters will produce a great result with this recipe, but if you’re looking to get as close as you can to true espresso, go with the metal filters.
---
This Aeropress espresso recipe gets close to true espresso, but it doesn’t quite hit the mark. Still, that’s saying something, considering the Aeropress only costs $25 and solid espresso machines are $200+.
And when you brew with freshly-roasted coffee (not beans that have been sitting on a grocery store shelf for weeks), that difference between Aeropress espresso and true espresso gets really, really small.
Our Javapresse Coffee ships out coffee beans just two hours after roasting, so when they get to your door, they're still hyper-fresh, specialty-grade, and full of rich flavor.
These beans are meant for Aeropress espresso!
* Images by Mark


